A Motorcycle Glow-Up with $20ish of vinyl, time, creativity, and a Cricut
There is something about owning a motorcycle that makes personalization almost inevitable.
It may start innocently enough. You find a bike you love, make a few practical changes, perhaps add a different seat or set of handlebars, and tell yourself you’re finished.
Then you see something: A color combination. A graphic. A set of wheels. A bike at a show that has one little detail that catches your eye. And suddenly you’re looking at your own motorcycle wondering what you could do to make it feel a little more like you.
That’s exactly where this project started.
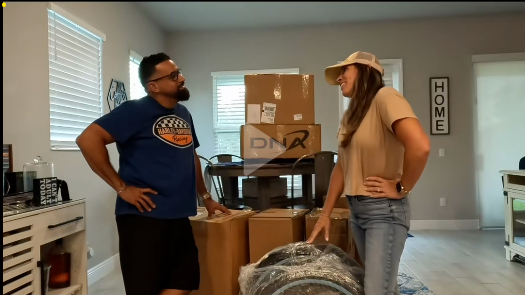
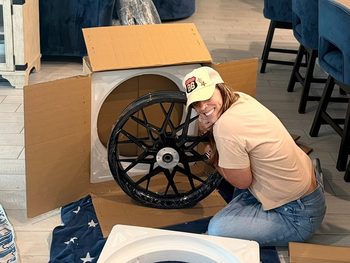
A friend wanted to give her motorcycle a little more personality and brighten up the overall aesthetic. There was no need for a complete rebuild or an expensive custom paint job. The bike was already a great starting point. It just needed a few details.
So we decided to see what we could accomplish with something that many people already have sitting in a craft room or home office: a Cricut machine.
Motorcycle customization doesn’t always mean a major build
When we talk about customizing motorcycles, the conversation often goes immediately to the big stuff:
- Paint.
- Wheels.
- Exhaust.
- Bars.
- Seats.
- Suspension.
- Performance upgrades.
And those are certainly some of the things that make building a motorcycle so much fun. I’ve spent plenty of time—and probably more money than I should admit—changing motorcycles to make them perform, fit and look the way I want.
But not every change has to be a major modification. Sometimes it is the smallest detail that changes the way a motorcycle looks.
For this project, we designed custom vinyl graphics that could be cut at home and applied to the motorcycle as an accent. It was a relatively simple project, but the finished result gave the bike a completely different feel.
That is one of the things I enjoy most about customization. It doesn’t always take a complete transformation to make something feel completely different.
Your Motorcycle is a Blank Canvas
One of the advantages of vinyl graphics is the amount of freedom they give you to experiment. You can create something completely original, recreate a design you’ve been thinking about, add your name or nickname, incorporate a favorite color or simply use a graphic to highlight a particular line or feature of the motorcycle.
For women riders especially, I think this opens up some interesting possibilities.
There are plenty of motorcycles on the road that look almost identical coming off the showroom floor. Once you start attending rallies, bike nights and motorcycle events, you quickly realize how much personality can be added through customization.
And that personality doesn’t have to fit anyone else’s definition of what a motorcycle should look like.
- Maybe you want something feminine.
- Maybe you want something aggressive.
- Maybe you want something completely unexpected.
- Maybe you just want a little more color.
That’s the beauty of building your own bike.
Cricut Makes It Surprisingly Accessible
If you have never used a Cricut before, the basic concept is fairly simple.
- You create or select a design in the Cricut Design Space software
- Load your vinyl
- Let the machine cut the design.
- Weed away the excess vinyl
- Apply transfer tape
- Prep the surface and position the finished graphic on the bike
Of course, there is a little more to getting a professional-looking result than simply pressing the “cut” button. Surface preparation, measurements, placement and patience all matter. But the equipment itself makes it possible for someone without a professional graphics shop to experiment with motorcycle customization from home.
And that’s what I like about this kind of project. The barrier to entry is pretty low. You don’t need a fabrication shop, a paint booth, or thousands of dollars in parts – You need an idea, some appropriate vinyl and the willingness to try something.
Start small for your 1st Vinyl Glow Up
If you’re considering trying vinyl graphics on your own motorcycle, you can start with something small and experiment as often as you like.
- A name: Lots of people name their motorcycles – share yours and give it a little flavor!
- A number: Got a Cafe Racer or a Performance bike, throw some racing flavor in there with a Retro-inspired number.
- A logo: Show off your mods with a logo to match or re-make the manufacturer’s logo into an accent color of your choosing.
- A stripe: Break up solid colors with an accent stripe or graphic
Possibilities are endless. Starting with something smaller makes the application process a lot less complicated. Covering half the motorcycle can come with some advanced challenges that take a little more experience to get a polished result.
Pay attention to the lines of the bike when deciding where to place your graphic. A design that looks great on a computer screen may look completely different once it is sitting on a curved motorcycle panel.
Measure Your Placement
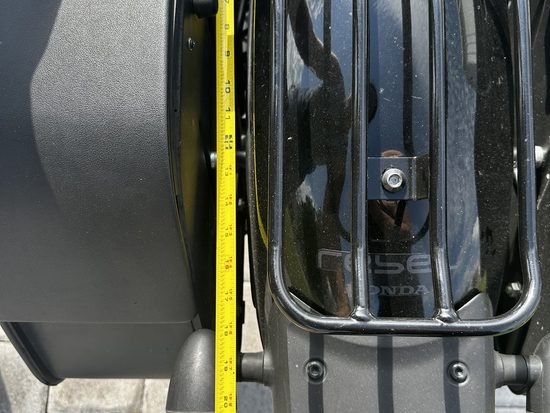
Look at it from different angles. What size space do you have to work with? What would have to be removed and reinstalled to properly lay the vinyl? Where do panels, inserts, bolts, or other objects cut into your design? Take lots of measurements and photos to reference during your design process.
Design your Graphic
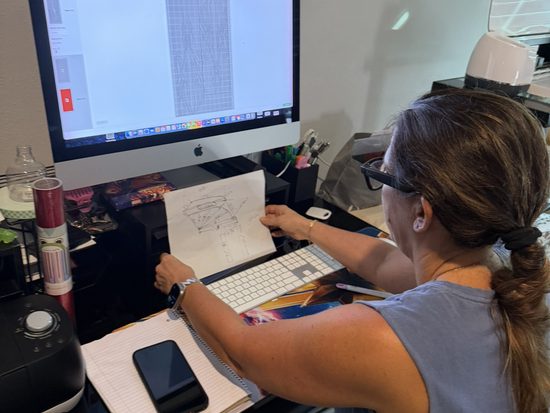
Using your measurements and sketches, play around with laying out different designs in Cricut Design Space (or your cutter’s design tool). You can use logos, different colored vinyl, cutouts, and more to get your desired look. The possibilities are endless.
This part of the creative process can be the most fun, and time consuming.
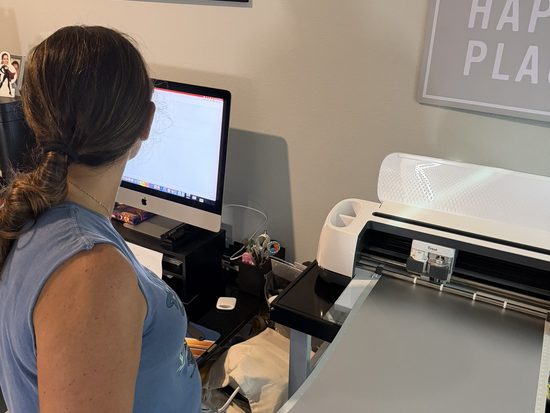
Cut your Vinyl Graphic
Once you have created a design you love, and have matched it up against your drawings/canvas measurements — its time to cut your designs. Look out for:
- Fine/Complex design elements: they will be difficult to apply/transfer and will not adhere well to the curvy lines
- Multiple Layer Groupings: Stacking/Grouping different color vinyl layers can take some practice to align on the bike
Installing the Vinyl
Once you have cut, weeded, and applied your transfer tape to your design, it’s time for the install. Surface preparation is key – make sure you have a clean surface, wiping it thoroughly with rubbing alcohol before applying your vinyl. Remove components that will impact your design (so you get that clean, flush install) and trim around bolt holes and other objects that your vinyl flows into.
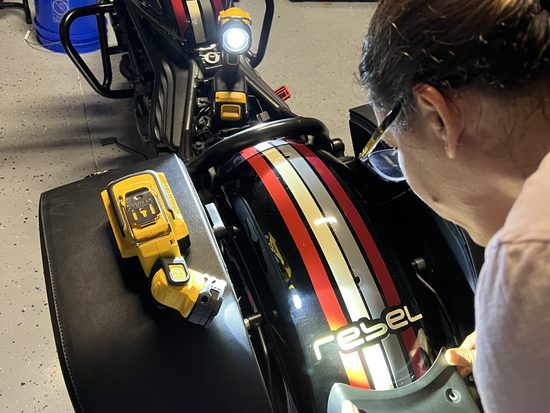
You’re designing the motorcycle.
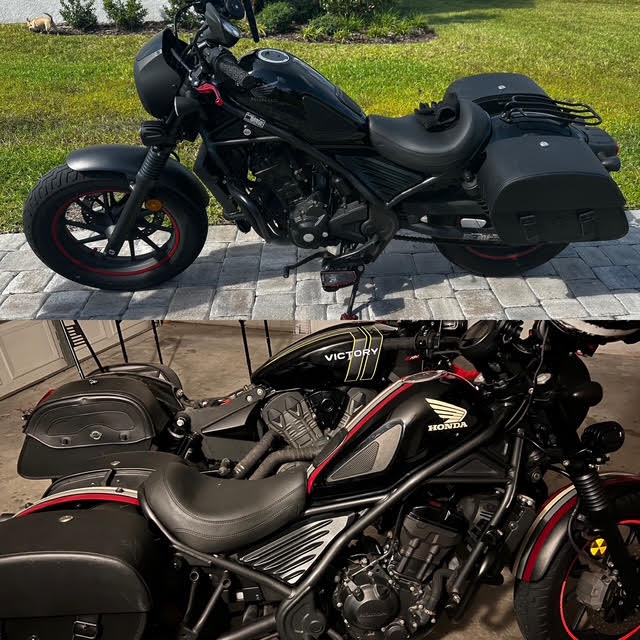
Final Before / After
Once you’re done, reinstall any components you needed to remove to lay your vinyl design. Be sure you’ve tucked/trimmed any edges so they don’t catch and peel prematurely. Try not to wash it immediately to give the vinyl adhesive a chance to set.
The Small Details Are What Make a Bike Yours
That’s really what this project reminded me of.
I’ve worked on motorcycles where the changes were substantial. I’ve spent time researching parts, comparing manufacturers, planning installations and figuring out how a modification will affect the motorcycle once it is actually on the road.
Those projects are incredibly rewarding. But there is something equally satisfying about making a small change and realizing how much of a difference it makes.
The right graphic can bring attention to a body line. A little color can break up an otherwise monochromatic motorcycle. A personalized detail can make a factory motorcycle feel considerably less “factory.”
And perhaps most importantly, you don’t have to wait until you have the money—or the time—for the next major modification.
You can start with what you have.
Build It Your Way
One of the reasons I wanted Horsepower & Heels to continue expanding into motorcycle content is because I want to show more of these projects.
- Not just the finished motorcycles at a show.
- Not just the expensive builds.
- But the process.
- The experiments.
- The ideas that work.
- The ideas that don’t.
- The modifications that make a real difference for women riders.
- And the little projects that prove you don’t have to be a professional builder to participate in customizing your own motorcycle.
Whether you’re turning wrenches in the garage, designing graphics at the kitchen table or simply trying to figure out what your next modification should be, there is something incredibly satisfying about looking at your motorcycle and knowing:
I made that mine.
For this project, all it took was an idea, some vinyl and a Cricut. The motorcycle didn’t need a complete makeover. It just needed a little more personality.
And sometimes, that’s all it takes.
Want to Try It Yourself?
If you’re interested in creating your own motorcycle vinyl graphics, start with a simple design and experiment before tackling a larger project.
And if you give it a try, we’d love to see what you come up with.
Comment below / Tag us with your creations!
Because around here, we’re always going to believe there is more than one right way to build a motorcycle.
Build it. Customize it. Make it yours.
— Erica Ortiz
Horsepower & Heels